double sided tape for leather
Double Sided tape for leather. It can be used to hem garments made from leather or other similar mediums. I always use it on leather in the following fashion, however this story is about one of my customers who had a coat and the fabric had been coated (like curtains).
She wanted the sleeves and hem shortened. The sleeves needed to be shortened 3 cm (1 1/4") and the length up one hem length. The coat was lined, and the two front sections were bagged back with the lining attached at the end of the front facing. The lining was not attached to the hem.
Everyone has a quirk and my client's quirk is that she does not want to see any stitching on hems, which means they have to be done as a blind hem or in such a way as it will not be noticed. This can be a challenge when the fabric is a polyester which has been treated with an opaque rubber backing on the back of the fabric.
Note - You may have noticed this technique used on curtains. They coat the fabric with a liquefied rubber polymer in a single coat to an uncoated fabric. The fabric is then fused dry by a heated roller. My own curtains have been treated twice which is typically called "2 pass coated". It blocks out any light keeping my bedroom very dark. The maximum a fabric can be treated is 3 passes.
Back to the coat.
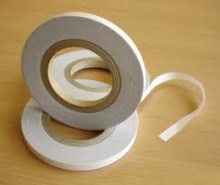
I was unable to use my blind hemming machine, in case it marked the outer fabric, and you would have seen every stitch. I could not hand stitch the hem, so that left my trusty double sided tape. This tape is not your normal double sided tape that you use to put pictures on the walls.
I purchase mine from a sail maker. I have one who operates in the industrial section not far from where I live. When I lived in Sydney I purchased from a sail maker down there. You can buy this tape in a variety of widths, but I prefer the thin 12 mm (1/2") width for my purposes. It costs around $5 per roll.
This tape is very thin, yet very strong.
Preparation - I unpicked the existing hem. The lining needs to be unpicked up the panel. This needs to be enough so that you can get into the inside of the panels to bag.
Do not unpick the two front panels at the bottom seam. Leave them stitched, because this stitching is your reference point. I was fortunate that the original stitching for the hem was the exact amount I was shortening the coat, so I flipped the front panels inside out and bagged the two front panels. By leaving the front panels bagged, and just flipping them inside out, you have that reference point you need. In this case it was going up 4 cm (1 1/2") from the original seam. When you shorten a coat, the two front panels can be marked up the amount the coat is being shortened, marking from the original stitch line and up the new length, then down your seam allowance.
Hint - BEFORE you cut your hem, always bag the front panels. This way you can use the existing example of how they cut the hem, except you cut on the new cut line (which includes your hem allowance)
With the two front panels stitched, you will need to cut off the excess. Be very careful that you only cut up to BUT NOT INCLUDING the hem allowance on the coat. Take a good look at the way it was cut before, and repeat this practice (only shorter) You will notice that the front panels will be cut close to the seam, yet you have to leave a good hem allowance in the section past the front encased panels. So cutting this correctly is important.
Iron up the new hem.
Over lock the edge, or lay tape, lace or ribbon over the raw edge and stitch.
To ensure that the hem does not drop, join the seams that butt each other at the hem allowance.
For example - the centre back seam. When you ironed up the hem, the hem folds back on itself, and the seam allowance butted into itself. Slip your fingers down into the hem allowance and take hold of the two seams. Stitch them together. I find it best to sew from the fold 3/4 up to the edge of the hem allowance. If you try and drop the hem now, you will find that you can't because it is held in place by your stitching.
I do this when I am securing a lined jacket sleeve or hem.
Do this on every seam all the way around the hem allowance.
It is now time to attach the double sided tape. Cut off a 5 cm (2") section and attach it on the wrong side of the hem allowance just on the edge or just below the over locked edge. Peel off the side with the paper on it, and press the hem allowance down. You must make sure that it is sitting correctly, so that you do not get a twist.
Repeat all the way around the coat. Voila. You now have a blind hem on fabric that cannot be hand stitched.
Tip - Use this tape for shortening the sleeves on leather jackets, suede jackets, or any other type of garment that this tape would work on. It really is very strong, and you should not be able to notice the join. Remember this is a special double sided tape purchased from a sail maker. Google your nearest sail maker and ask him if you can buy some. My guy charges me AUD$5.00 a roll. I do not know how much is on the roll, but I think it would be around 25 meters (27+ yards)
Happy altering
Judith Turner